Saturday, January 18, 2014

Custom Kingdom Rush Lego Set

Kingdom Rush is an awesome fantasy tower defense game created by Ironhide Game Studios. My kids and I play, and my nephew who is four does as well.  This Christmas he asked Santa for a Kingdom Rush Lego set and his dad @mundanename, asked us for help.  He posted the results on twitter and @ironhidegames reposted it. Since then there has been some interest in the custom set, so here I will provide the images I created, and some instructions.

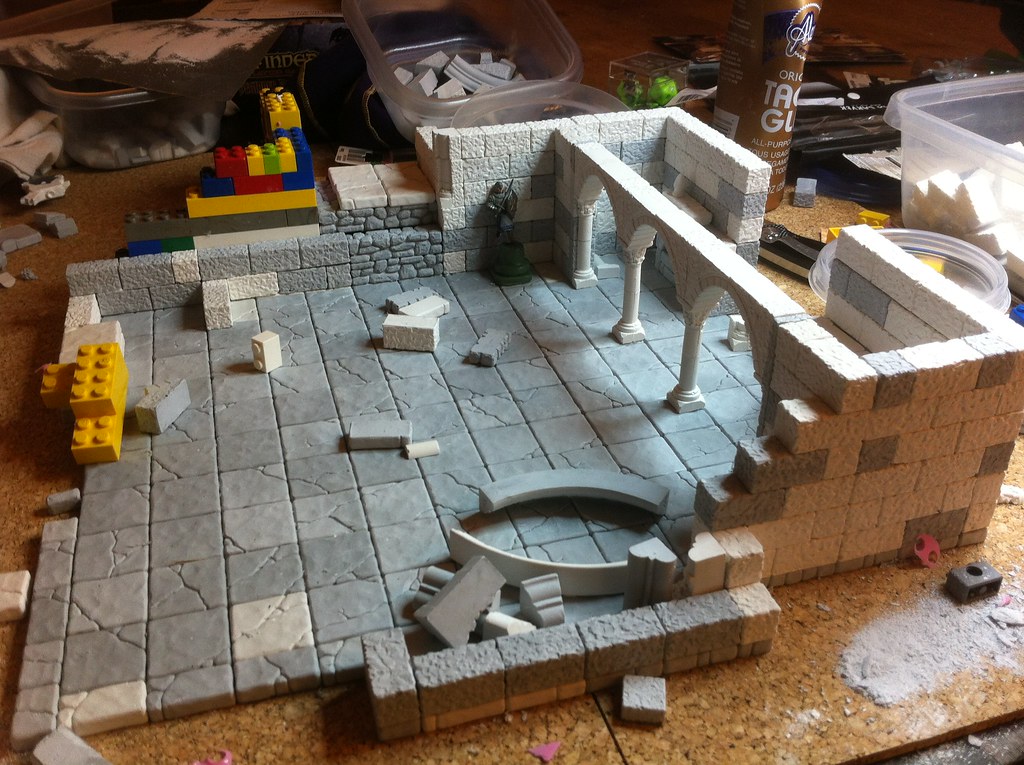
To begin with my kids dug into their extensive Lego collection and built some towers.  They created towers that could have three "levels" of progression, some parts to add on to designate leveling up.  The figures and parts can all be found on ebay for single characters such as the troll, or anywhere for full sets that will have characters and appropriate parts, such as the Lord of the Rings Hobbit Urak-Hai Army.

Once the sets were created we could then take pictures to use for creating the box images and instructions as seen in the accompanying images.  It took awhile to find a Kingdom Rush image that worked well for the box.  Sadly I do not know the source of the images used.  I was in a rush and did not think I would be posting these, so crediting a source was not my concern at the time.  In any case, all credit goes to Ironhide Game Studios, and the awesome Kingdom Rush game ... go buy it now!  Well, and of course Lego deserves some credit!

A Lego box from another set was used to hold the pieces. Kingdom Rush images modified with photos of the built legos were then used to skin the box. In Photoshop I made my images match the dimensions of that box.  Something to note was that since the box, and the play mats are all larger than an 8.5 x 11 inch print, I had to find a way to easily print a large image across multiple sheets.  The program I found to do this was PostRazor this allowed me to pick a print size and print the image across multiple sheets. I then used a paper cutter, and painstakingly taped all the pieces together.  The first time I did the play mats I discovered that they were too big for the laminator I had access to (around 24 inches wide) and so I had to do them again!  For the box covers, I used clear packing tape.  I applied the box images and then totally covered the box.


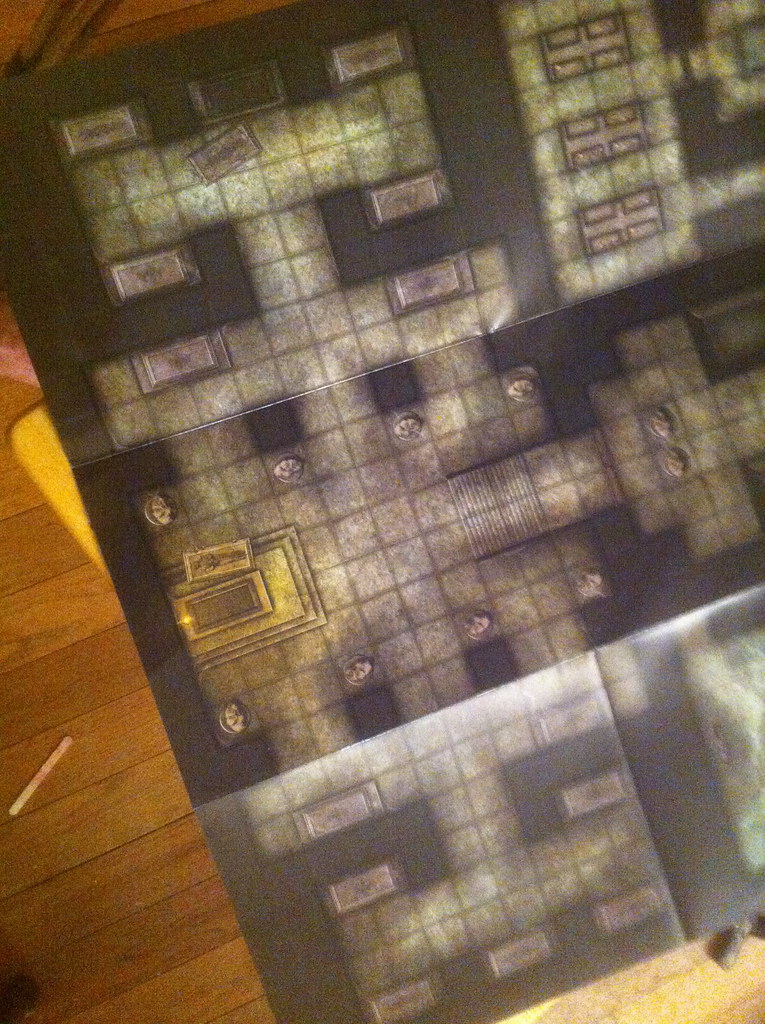
For the play mats all I could find were images of levels "in progress". The images included a great deal of activity.  I wanted mostly blank levels without any creatures on the roads and no buildings yet placed.  Photoshop and the clone tool quickly removed anything I didn't want in the images.

Last, we needed instructions for the build.  We considered using Lego's Designed By Me software to make actual instructions, but first, I did not think it would have all the "unique" pieces we had used and second it would have been very time consuming, so that just didn't happen. Instead, we had the kids take apart each set while taking a picture after each piece came off.  When put in reverse order you have visual build instructions.

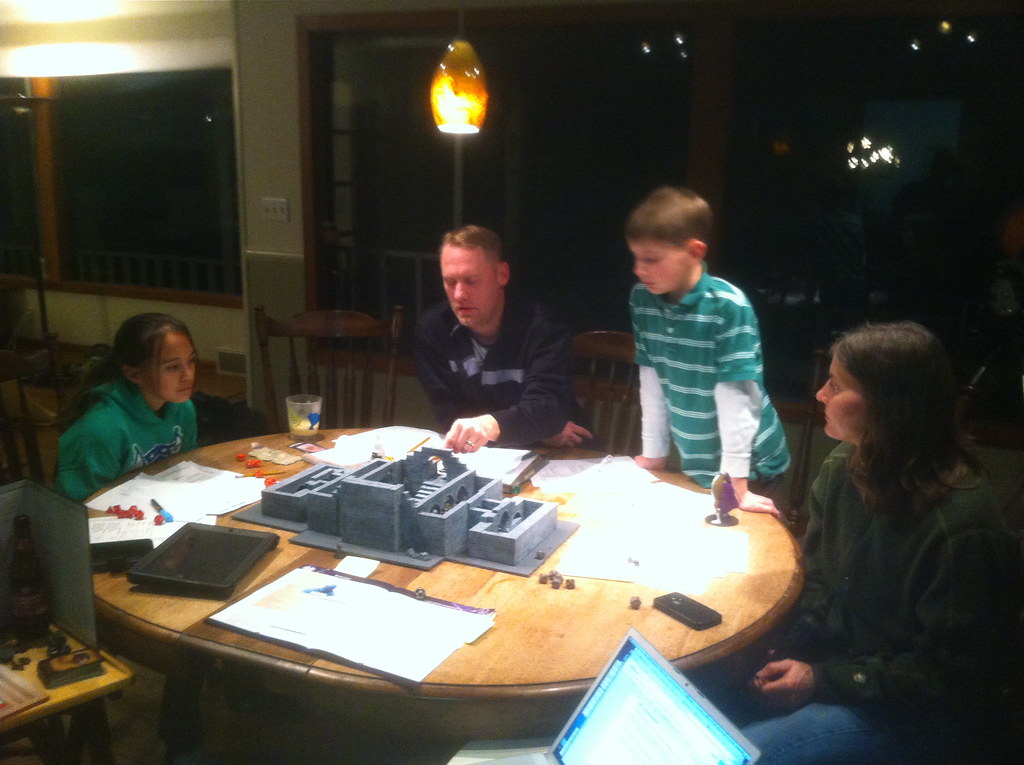
Voila! Custom Kingdom Rush Lego set!


Sunday, May 5, 2013

Figure Mods

Even though we are using virtual table top software, as a group we still like miniatures so the extent of our use of the software is to project high quality maps with dynamic lighting.  We all get by with our painting, and I am willing to put quite a bit of time into the player models.  I prefer that the figures pretty closely match the character.  For instance in the Carrion Crown adventure path being run by Jerrod I am a cutlass wielding magus that is a member of the Jenevier's crew.  So, sailor-like, with cutlass.  I found a good Reaper Mini, but he was holding a musket, so I changed that.  I snipped off the pistol you can see in the right image, and added the front of a cutlass that I also ordered from Reaper.  Sadly we're playing with Cthulhu-esque insanity rules and this character will be insane soon.

The second modification we needed for Carrion Crown was my wife's cleric.  I love playing with people that don't know the rules because their characters are completely story-driven or "this is interesting"-driven.  She is a cleric who worships Jazirian, the god of the Couatl, "a long, feathered serpent with a pair of rainbow-feathered wings that allow it to fly." (Wikipedia, 2013).  Because of the rainbow colored wings she found an image of a woman with rainbow colored hair, and the look of her character was formed. 
Based on some of my knowledge of Pathfinder, and the usefulness of attacks-of-opportunity as a focus for clerics we decided her character would use a "Flying Blade".  An exotic gladiator style weapon consisting of a crescent shaped blade at the end of a 10 foot chain.  In our first session we quickly found a figure for her.  The WizKid's "Evil Cleric" was close.  Short, bright hair with studded leather.  Good enough.  Finally, after a few weeks of play I modified the WizKids figure.  Using Green Stuff I modeled and painted some hair (BIG improvement!).  I ordered some chains from Reaper (and am just noticing the great crescent shaped blades).  I modeled a blade using Green Stuff, snipped off the Evil Cleric's holy symbol and blade and worked it all together. Last I added a hilt for the sword that should be in the scabbard. (I have some Games Workshop sets and you end up with tons of extra weapons.


You can do a lot with a little Green Stuff and very little skill.  Again though, I have the greatest respect for skilled modelers.  I can barely make a simple ... anything.  While I will likely never have any skill at modeling I am hoping to one day make my own figure.  In a later post I will show some of the figures my kids and I have attempted.

Sunday, April 21, 2013

Future ... I am in you ...

We are beginning a couple of new campaigns here.  My cousin is running a horror based campaign, Carrion Crown, and his daughter is going to run Serpant's Skull, a jungle crawl.  A few things came together at the last minute prior to the horror of Carrion Crown starting that allowed us to try digital maps with interactive lighting.

This allows us to display the professionally rendered maps found in the modules.  It's always sad that the game master gets to see the professional maps, but the players just get to see the DM's chicken scratch reproductions.  While you can create awesome 3D representations such as in our Everflame game these take an extreme amount of time. While I intend to still make models like from our Everflame game, projecting the provided maps is quick and easy.  Paizo even provides PDF interactive maps that allow you to turn off the room labeling as well as activate a "player view" that conceals secret doors and the like.

Using the provided maps you can now easily project them, but you need to be able to cover what the players can't see.  There are many virtual table top programs that allow this "fog of war" behavior but what I really wanted was "dynamic lighting".  Dynamic lighting allows you to place a token on the map as a light source, and then that light source will reveal only the parts of the map that you could see based off of how far you defined the light to shine, and what walls are in the way.  With a little bit of work on a map including the adding of walls and doors you've got a whole new layer to the game.

A few of the existing virtual table tops have this functionality, but I settled on Roll20 because one, it was the easiest to figure out, and two I had an account already, with full privileges because I contributed to the Kickstarter for TableTop Forge which later merged with Roll20.

Now, we can display high quaility maps and show exactly what our characters can see at any given time.  The group can see where shadows are (and thus where maybe you could hide), and instead of wasting time drawing maps that look horrible, we just display them.  Like I said, it's a whole new layer to the game.  Currently we are projecting from above, but we are also considering embedding a 42" LED in a table, or doing rear projections.

Basically, at this point, it's all gravy.

Sunday, January 13, 2013

The Build - Crypt of the Everflame

Here is a Flikr photo set with images from the build of the Crypt of the Everflame. I really have no estimate of the time it took to do as I did an hour here, a few here, cast bricks while doing other things, etc. It was a three or more months of calendar time though, but I went weeks without working on it.

I tried to stay as true to the provided map as possible while making alterations necessary for working with the Hirst Arts materials.  For instance you can see the pillars in the map are 5' x 5' while the Hirst Arts pillars are smaller, thus placement was different.  Also, originally I did not know I was going to make sarcophagus lids so I used insets in the walls at first.  All in all I think it ended up being pretty close to the original while utilizing some of the cool things that could be done with Hirst Arts.

This was my first such build.  As stated in an earlier post, I was introduced to this technique during two sessions at PaizoCon 2012 presented by Sean Reynolds. One was using foam for terrain making and the other was on casting castle and dungeon bits using Hirst Arts molds.  I highly recommend the Reynolds sessions as a great introduction to both techniques, and recommend Hirst Arts.  Hirst makes awesome molds that can be used for specific builds, or for making Dwarven Forge type reusable pieces.

Here is a list of some of the materials I used in this build:


Crypt of the Everflame Game Play

When finally had the chance to use my Hirst Arts crypt in game play.  I made some alterations to the encounter to allow us to spend a bit more time with it.  Instead of the written four skellies supporting Asar I have him fifteen.  Some of these were D&D fourth edition-esque "minions".  I did not want to TPK the party, but I did want to extend the number of rounds they were there.  Not all fifteen were exposed at first either, so this lessened the impact.  In addition one skeleton had a trick-shot bow that he used to disarm, trip, etc.  Again, not causing damage, just delaying players.  Another skeleton used an enhanced bashing shield (written into the encounter) to bull rush with.

Asar at first held the hostage as a shield to prevent ranged attacks.  I also gave him a "Push" spell ability to push back immediate threats.  Last, I allowed Asar to raise four corpses (the bandits) as minion style zombies.  When that happened the collapse feature of my crypt archway was triggered, hampering players in the area.

Doing all this took the encounter towards, but not TOO close to a TPK.  We had two members down at one point, and let us play for over two hours.  A good time was had by all.  Other modifications to this encounter included an interesting magic item for each player.  Again, this module was the first RPG experience for a couple of the members, and a early experience for a couple others, so I wanted there to be some good loot as a reward for them.


Check out the Flikr - Photo Set.

Tuesday, January 8, 2013

Back to the Inn

Ever since we had kids my family has not left home on Christmas. We don't travel to the various parents (all local), we make them come to us.  In return we usually do dinner for a couple sets of them. (We have more than our share)

For some reason my wife and I decide that this year our Christmas dinner should be a medieval feast.  I think the thought process was, "let's do game hens ... hey, what about buying tankards and daggers and calling it a medieval feast!"  We're like that. Given the bounty of good fresh and dried fruits, vegetables, meats, drinks and such it was probably more of a fantasy feast that an adventuring party may order up with some of the haul from the latest dungeon delve.

I found some very cheap daggers (what I found were actually $1.75 ... sadly I had to pay shipping on EACH one. Still cheap), a set of wooden plates, and I scored a great eBay purchase on some glass bottomed pewter tankards.  Add piles of food and a carcass each and it was probably the best Christmas dinner since the pagans were converted.

The best part was that we didn't even warn anyone.  When it was time to eat we just sat everyone down ... "Here's your dagger ... throw me a sweet roll!"  I am looking forward to incorporating this into a gaming session.